As from the 1st of August 2018, an enhanced continuing professional development (CPD) scheme will start for dental care professionals (DCPs).
What does this mean? It means that there will be changes to the verifiable CPD criteria, and it is extremely important that as dental nurses we familiarise ourselves with these changes to meet the General Dental Council (GDC) requirements and standards.
What do these changes involve?
The GDC wants DCPs to get the most from the CPD activities they complete and to make these activities more relevant and meaningful.
To do this, they have developed the ‘plan, do, reflect and record’ model, which encourages nurses to identify their own learning needs and choose CPD activities to fulfil these. It will be a GDC requirement for DCPs to align CPD activities with development outcomes that are linked to GDC standards.
From August, nurses will need to have a personal development plan (PDP). This plan will help to identify relevant CPD needs. Nurses will be required to plan CPD activity according to their own individual field of practice.
Once these CPD activities have been identified and planned, the GDC want nurses to complete (do) these learning activities, spreading them evenly over the five-year cycle.
Don’t worry if you’re like me and are part-way through a CPD cycle – the GDC has created a transition tool.
On completion of learning activities, the GDC wants nurses to reflect. This will help to ensure that learning needs are being met and that the learning activities undertaken are relevant to the individual’s role.
After participating in learning activities, it is important to record your verifiable CPD. Remember: keeping a CPD record is an important part of keeping your registration.
Nurses need to complete 50 hours of verifiable CPD in the enhanced CPD cycle.
All verifiable CPD should be recorded, and paperwork (including the personal development plan and evidence such as certificates and the record log) should be kept readily available in case the GDC asks to see this after a five-year cycle.
Under the new scheme, non-verifiable CPD no longer needs to be declared. However, nurses are required to make an annual statement of the verifiable CPD hours they have completed (and are still required to make a statement if no hours have been completed).
If you’re like me and are a little bit scared of change, don’t panic! The changeover from the old CPD cycle to the new enhanced CPD scheme has been made simple by the GDC.
At Dental Nurse Network we are currenty updating all our CPD/website information and courses ready for 1st August 2018.
Written by Emma Edwards RDN
NEBDN National Certificate in Dental Nursing, NEBDN Dental Sedation Nursing, NEBDN Oral Health Education , NEBDN Dental Radiography, Kings Certificate in Implant Nursing, Level 5 Diploma in Leadership and Management, Level 3 Award in Education and Training.
News
An index is a measure of data. In dentistry, we use different indices to measure data. As nurses, the two we are most familiar with are:
Basic periodontal examination (BPE) – an examination carried out by the dentist that will identify the presence of periodontal disease.
Turesky plaque index – a method used by dental professionals to measure the presence of plaque.This article focuses on Turesky plaque scoring. I will describe the method, how it is conducted in my practice, and how we interpret the results. I will then conclude by considering how the results from this process can act as a motivational tool when promoting good oral health.
Method
When conducting Turesky plaque scoring, we should:
Gain consent from the patient.
Check the patient’s medical history, including asking the patient if they have any allergies – in particular to Vaseline, as this is used as a protective barrier on the patient’s lips to help prevent staining.
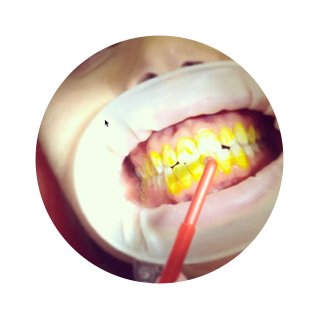
Disclose the patient’s teeth.
Using the Turesky plaque scoring index shown below, record scores for the buccal, labial, palatal and lingual surfaces of each tooth.
The total score is then divided by the number of tooth surfaces, giving us the Turesky score.
The Turesky score is then used to assess the patient’s oral hygiene using the table below.
When conducting Turesky plaque scoring, we are aiming for a score below 1.5, as this is indicative of good-to-excellent oral hygiene.
Example Plaque Score
Turesky plaque scoring in my practice
I work as an orthodontic nurse, and good oral health is essential for patients having orthodontic treatment.
To help us support and monitor patients, we disclose and Turesky plaque score their teeth at their pre-treatment appointment and as required throughout treatment.
Turesky plaque scoring ensures that, as a practice, we are meeting Principle One of the GDC standards – put patients’ interests first.
It would not be in a patient’s best interest to put an orthodontic fixed appliance on if they have poor oral hygiene, due to increased risk of cavities and gum problems caused by insufficient tooth brushing.
All nurses in the practice are qualified and competent at plaque scoring and delivering oral health. This makes these appointments an amazing opportunity to use our additional training and skills.
Turesky plaque scoring has many advantages, including:
The clinician can identify areas the patient is missing when cleaning. Using this information, the clinician can make an oral health plan for the patient that meets their individual needs.
It gives us a baseline that can be referred to during treatment.
It’s a visual motivational tool that allows the patient to identify areas they are missing when they are cleaning.
If using two-tone disclosing solution, the clinician and patient can see plaque that has been missed when brushing that day and areas that have been missed for longer than 24 hours.
Disclosing can be incorporated into the patient’s home oral hygiene regime in the form of disclosing tablets. This gives the patient a visual aid that can be used as required.
Turesky plaque scoring results
In orthodontics, the results from Turesky plaque scoring will influence the oral hygiene advice given to the patient. Pre-treatment appointments are a great way to build professional relationships with patients (and, if they are children, with their parents or guardians) that will continue throughout treatment.
If the patient’s Turesky score is below 1.5, indicating good to excellent oral hygiene, the patient will be given oral hygiene instruction to reinforce their already good oral hygiene regime – they will be given praise for their hard work and the importance of continued great brushing will be emphasized.
If the patient’s score is higher than 1.5, they will be given more detailed oral hygiene instruction. Tooth-brushing technique will be demonstrated, and the patient will be provided with a toothbrush so that they can demonstrate to us in the dental surgery their new skills learnt when removing the disclosing solution. The patient will then be provided with disclosing tablets to take home and an appointment will be scheduled for two weeks’ time to review progress and hopefully note improvement.
If little or no improvement is made in this time, the treatment won’t proceed, as orthodontic treatment will make it more difficult to brush, increasing the risk of gum disease and caries.
Conclusion
Although I have discussed the advantages of Turesky plaque scoring in relation to orthodontics, it is an amazing tool that is used in all areas of dentistry. Preventative work and oral health promotion is such a key part of our profession, and using Turesky plaque scoring helps the clinician and patient easily identify and improve areas that are being missed when brushing.
My further training means that I can Turesky plaque score patients’ teeth, and then, as an oral health educator, provide my patients with an individual oral health regime to meet their needs.
Turesky plaque scoring is an excellent motivational tool, and we routinely use it within our practice to monitor and support our patients through their treatment.
I am lucky that in my position I can work alongside patients and help them to improve their oral health. It is so rewarding to be able to provide our patients with life-long skills and help them to maintain a healthy mouth and smile.
NEBDN National Certificate in Dental Nursing, NEBDN Dental Sedation Nursing, NEBDN Oral Health Education , NEBDN Dental Radiography, Kings Certificate in Implant Nursing, Level 5 Diploma in Leadership and Management, Level 3 Award in Education and Training.
News
In 1932, Henry Schein and his wife Esther opened a pharmacy in Queens, New York. Over the course of the next eight decades, the company grew and Henry Schein Inc. is now the world's largest provider of healthcare products and services to office-based dental, medical and animal health practitioners.
The company now provides a range of products and services, including solutions for operating efficient practices and delivering high-quality care. Henry Schein operates through a centralised and automated distribution network, with more than 96,000 products in stock, as well as more than 110,000 additional products available as special-order items.
Henry Schein employs nearly 16,000 people and serves nearly 800,000 customers across 25 countries. However, despite its size, the company remains committed to the values-based culture that Henry and Esther infused in their business from the beginning.
The company was founded on the belief that they could fulfil their responsibilities as a corporate citizen by giving back to the industries and communities they serve. They have contributed healthcare products and applied their logistical expertise to help broaden access to healthcare. Through this they have helped millions receive the care they otherwise would have gone without; increasing access to care for at-risk and under-served populations around the world.
The company focuses on three areas around expanding access to healthcare: wellness, prevention and treatment; emergency preparedness and relief; and building capacity in the training of professionals and the delivery of healthcare services.
The company is also committed to protecting the environment for future generations. They help health professionals to ensure their practice is as environmentally friendly as possible, and they make sure that each member of its staff has the tools and information they need to minimise their environmental footprint.
As a result of this social responsibility drive, Henry Schein has frequently been ranked first in the industry for social responsibility on FORTUNE’s list of the World’s Most Admired Companies, and has been ranked as one of the World’s Most Ethical Companies by Ethisphere.
One area of health that Henry Schein concentrates on helping is dental care: in a world where 75% of the population do not have access to a dentist, Henry Schein’s help is welcome to those trying to address these inequalities.
One of the charities that Henry Schein has supported for many years is Bridge2Aid, a dental charity based in Mwanza, Tanzania. They train rural-based health workers in developing countries, providing them with the skills, equipment and resources that they need to provide emergency dental care.
Henry Schein Dental have donated dental materials and been involved in both event and employee fundraising. They have sent a team out to Tanzania, and help organise the charity’s annual BASH!
In the UK, Henry Schein has teamed up with Colgate to run the ‘Helping Kids Smile’ tooth brushing programme, aimed at improving the health of children’s teeth. Working with a number of schools, the programme involves children brushing their teeth whilst in school. They learn the importance of tooth brushing and how to do it effectively. Dentists are also going into the schools to check children’s teeth.
The company also plays its part in educating dental nurses. They sponsor Dental Nurse Network courses, thereby enabling excellence in dental nursing, and empowering nurses by educating and inspiring them. Here at the Dental Nurse Network, we also support Bridge2Aid and hold the same values as Henry Schein in terms of corporate social responsibility and ensuring we give back in order to help under-served populations.
News
Well, where should we begin? I suppose it all depends on the current circumstances within your practice and on how much or how little work may be required to get your project off the ground. For example, the first practice in which I ran an oral health clinic already had a fairly well-established service. Their existing oral health educator was leaving, and it was planned that I would gain my qualification and take over from her.
If you are in a similar situation, this does not necessarily mean that you have to carry on running the service as it has been run previously. You are likely to have new ideas and be eager to make changes and improvements to the service, and hopefully you will find that your ideas are welcomed. You will feel more comfortable developing your service in the way that works best for you as an individual, particularly if you are the only oral health educator in the practice.
If, instead, you are starting out in a practice where there is no current oral health education service offered, you will have a bigger task ahead of you and may find the project of getting started quite challenging. However, being an oral health educator can be a rewarding role, and this challenge should not put you off getting started. Here are a few things to consider when starting in your role as an oral health educator and getting your service up and running.
Why are you offering the service?
A good starting point when beginning to plan your service is to think about why you are starting it at all. Which patients would you like your service to be available to? Who should be offered appointments? In my opinion, all practices would benefit from having an oral health educator, regardless of the treatment plans they offer – although different practices will benefit in different ways depending on this. For example, the first practice in which I ran my oral health education clinic had a National Health Service (NHS) contract for orthodontics. This service was extremely busy, and the majority of our orthodontic patients were teenagers. As you are likely to have experienced already in your career as a dental nurse – and as you possibly remember from your own experience of being a teenager – patients in this group often have a great need for oral health education! I have found during my time as an oral health educator that many teenagers do not brush their teeth as often as they should or for as long as they should. In addition to this, they are beginning to make their own decisions about their diet without as much input from their parents or guardians. Currently, energy drinks seem quite popular with teenagers, and many of them do not know about the oral health problems associated with these. Fizzy drinks – both the standard and diet versions – are also as popular as ever. Armed with this information and knowing that this group of patients would be my main focus at this practice, I was able to plan what I felt I should teach accordingly.
By contrast, in the practice where I currently work, we do offer an orthodontic service – but this is with a specialist in orthodontics and is on a private basis. This means that although we do have orthodontic patients who are in their teens, most of our orthodontic patients are adults. I have found that adults can be more motivated than teenagers with their oral hygiene when wearing orthodontic appliances, so the approach to their care can be different. In addition, most (but certainly not all) of these adult patients have more knowledge of how their diet can affect their oral health. This obviously changes what I am going to teach them, and the difference in age also affects my approach to teaching. So, if my orthodontic patients in this practice do not tend to need as much oral health education, why still offer the service? The answer relates to the fact that my current practice is primarily an implant practice. This often includes full arch (and sometimes full mouth) cases. We make drastic changes to patients’ mouths, and without our help and advice, they will often not know how to maintain a good oral hygiene routine. Many patients return to us for their review appointments and we find they are unaware that they need to clean their new restorations. It seems obvious to us as dental professionals, but I have seen this on more than one occasion.
You can see from these two examples of my own experiences that the service can differ greatly between practices. Such differences can be influenced by the main age group of your patients, the advice and education you give, and the treatments offered by your practice.
Planning your space
If you are lucky, you may have a dedicated space for your oral health education sessions – and this is great! However, I think it is more common for oral health educators to use a surgery which is also used by other members of the dental team during the week. This does not mean you cannot make it your own while you are using it and give your input into how the room should look. You can always keep certain things in another room and then get them out for your sessions only if you find that you need them.
Resources
Now that you have thought about who your service is for, you can start to think about what resources you would like to have available to suit their needs and to enable you to educate them well. I will not go into too much detail around teaching methods and ideologies in this article, as the focus is on setting up your clinic rather than on how to teach (and this will also depend on your own approach as an oral health educator). So, in terms of resources – what will you need? We will start with what I would class at the essentials:
• A mirror.
This is definitely an essential item, in my opinion, if you are providing oral hygiene instruction. Some people prefer to demonstrate products and techniques on mouth models. This is fine and can sometimes make it easier for a patient to see what you are demonstrating. However, I would always class this as something to do in addition to showing the patient in their own mouth. Techniques can often look much easier on a mouth model than they are in the mouth, and your patient could then be unprepared for their cheeks and tongue getting in their way when they try to repeat at home what you have shown them! I was taught that best practice is to demonstrate a technique to a patient and then ask them to repeat the technique themselves. They are more likely to remember what to do if they have practised the technique, and you can guide them if they are not repeating something correctly. If they are practising in their own mouth, they will know how these techniques feel. If you are showing a patient how to use interdental cleaning aids for the first time and they experience bleeding, they may be alarmed if this happens at home and they have not seen it before. If you are using a hand-held mirror, you will need to hold the mirror in the right place for the patient to be able to see what they are doing when they are practising your demonstration. If your mirror is wall-mounted, be mindful of where the mirror is on the wall. Small children may need a step to be able to see, whereas tall people may have to bend into an uncomfortable position if the mirror is too low for them.
• Oral hygiene aids.
When teaching oral hygiene techniques, it is not overly helpful to talk to patients about them or show pictures or videos. Although these will give patients an awareness of these products, they are unlikely to be able to use them effectively without your demonstration. Try to make sure you have a good supply of everything you might need. It is beneficial for patients to bring in their own oral hygiene aids so that you can demonstrate with their own tools, but often you will need to demonstrate something your patient is not already using. It is helpful to have your own drawer in your room to keep these things in, but if you are often moving into different rooms, or there is no available drawer space, consider using a small trolley for storage. That way, you will know you have everything you need and can keep it well-stocked. Do be aware that if you are demonstrating oral hygiene aids in your patient's mouth, they are likely to want to spit out, so you will need to have a sink or spittoon available.
• Teaching aids.
If you are delivering dietary advice, you will probably develop a collection of teaching aids – and this collection will continue to grow as you gain experience. Teaching aids could include laminated pictures of different foods and drinks, or empty packets; you will find what works best for you. Diet sheets can be a useful tool, particularly for working with younger patients, so always have those handy too. When providing oral hygiene instruction, you will probably also require a few additional things, such as study models. When I was providing a lot of oral hygiene instruction for patients with fixed braces, I often demonstrated techniques on a mouth model as well as in the patient's own mouth, as I felt this made it easier for them to see. It also helped to involve the parent or guardian when demonstrating techniques to younger patients.
• Posters and leaflets.
Posters can often help to reinforce your messages and add colour to your room. This can make your space seem more inviting to your patients. Creating your own is great, but it can be time-consuming. If you are using posters that have been made by somebody else or bought in, do check that the messages do not conflict with the advice you are providing. You do not want to be working hard to improve your patients’ oral health while providing them with conflicting messages that will just end up leaving them confused.
Leaflets can be a great resource to use, as they provide patients with something they can take home. Patients are unlikely to remember everything you discuss with them, particularly if they are nervous, so providing them with something that reinforces your messages once they are at home can help. After they have left, they may think of questions they wish they had asked you, and the answers to some of these questions could be in the leaflets you provide. Leaflets on various topics are easy to source if you do not want to create your own, although creating your own can mean that you can brand them to your own dental practice. If patients then share them with friends, you might find that their friends book appointments with your practice – this can bring benefits to your whole practice as well as yourself.
Have we missed anything?
How about a dental chair? Now, a dental chair is something which can be a matter of debate, so I have left this until last! Do you need a dental chair when offering oral health education? You can argue this point either way. If you are offering dietary advice, you probably will not need to lie your patient back in the chair – so no, you do not need a dental chair in this case. If you are demonstrating oral hygiene techniques on a mouth model then, again, you will not need to lie your patient back in the chair. But as I discussed earlier, I feel that it is always beneficial to demonstrate oral hygiene techniques to your patient in their own mouth. I feel it is far easier to tailor your oral hygiene instruction to their own individual needs if you can see into their mouth easily. After all, oral hygiene instruction is different for every patient, and the benefit of having an oral health educator is to provide this bespoke instruction. I know a hygienist who does give her oral hygiene instruction with her patient's sitting up in the chair, but I find it much easier if my patient is lying back so I can put the chair in the best position for me and use the inspection light. However, this does not mean that my way is the right way! If you feel that you, like the hygienist I know, are more comfortable offering oral hygiene instruction with your patient in a sitting position, there is no reason for you not to do this. So, do you need a dental chair for oral health education appointments? I will let you decide that one for yourselves! My final comment on this matter is that if you are working in your patient’s mouth outside of the clinical setting, you must make sure that the room you are working in allows you to keep to the infection control protocols set by your practice.
Another thing to consider is whether you are giving your patients anything to take away. Leaflets have their benefits, as I have already discussed – but is there anything else? Are you going to give them any of the oral hygiene aids you have demonstrated, or maybe some toothpaste samples? This will be personal to you, and your practice may already have their own ideas about this. Staff meetings can give you an opportunity to discuss this with your whole team to find out what everyone's ideas and opinions are.
One thing I have not discussed in this article is planning your appointment book. This, again, is something which will be individual to you and your practice. Be aware that when you are beginning in your role as an oral health educator, you are likely to need more time with your patients than someone who has a lot of experience. Also, oral health educators generally do not have a nurse to clean up after them like clinicians do, so do factor this in at the end of your appointments!
If you are planning to provide a whole new oral health education service, it can be quite a big project – but try not to panic about making sure you have absolutely everything from day one. Educators in any subject and in any situation build their tool-kit as they progress and learn, and it is no different for an oral health educator. During your first few months, you might find that you add something to your kit that a few years down the line you class as an essential that you could not work without – but this all comes with practice and experience. Once you have gained a lot of experience within this role, you will find that you have a tool-kit that allows you to prepare for every eventuality. Every appointment and every new patient can be a learning curve for you, and this does not mean you have failed at previous appointments; it simply means you have learned and improved. And remember, new products are constantly being introduced to the market – so look out for those and see if they will work for your patients.
Written by Katie Booth RDN, CTLLS
Registered Dental Nurse: 176794
Qualifications: Level 5 Certificate in Education and Training, TrainerQuals Level 3 Award Infection Control Trainer, Medical Emergencies Instructor Trainer, NEBDN Dental Nursing, NEBDN Oral Health Education, NEBDN Dental Radiography, Diploma in Performing Arts
News
During the placement of a dental implant, the implant dental nurse plays an important role within the implant team. This article discusses the different aspects of the dental nurse’s role, from cross-infection control to aftercare, and considers how these important contributions influence the success rate of dental implants.
The patient will attend many appointments during the planning and placement of a dental implant. These are:
The initial appointment – this is to explain what the treatment involves.
The assessment appointment – this involves planning and preparation for the proposed placement of the dental implant. At this stage, a treatment plan is made, and the clinician’s and patient’s expectations are clarified.
The surgical appointment – this is when the dental implant is placed.
Review appointment – this is to provide post-operative care, such as suture removal.
Implant exposure – this takes place if a healing cap was placed at the surgical appointment.
Abutment placement and impressions for restoration.
Restoration fit stage – this is when a restoration is fitted to the implant.
Follow-up appointment – this is to ensure that both the clinician and the patient are happy with the result.
Although the dental nurse plays a vital role in all stages of implant placement, the rest of this article will concentrate on the nurse’s role when assisting with the surgical placement of the dental implant.
Surgical Placement of Dental Implants
The role of an implant nurse during an implant placement procedure can be divided into different parts. These are:
Pre-operative care of the patient
This involves caring for the patient prior to surgery. Duties include:
Welcoming the patient into the surgery and checking that the patient has eaten in order to avoid the risk of a faint.
Checking the patient’s medical history, treatment plan and written consent, all of which are important to ensure the patient fully understands the procedure being carried out and to meet legal requirements.
Asking the patient to rinse their mouth with a chlorhexidine mouthwash for one minute to help lower bad bacteria in the oral cavity.
Helping the patient with placement of protective equipment such as safety goggles and theatre cap.
If required, instructing the patient to take antibiotic cover prescribed by the clinician – the type of antibiotic will depend on the patient’s medical history.
Preparation of the dental surgery for implant placement
Once the patient has been welcomed into the surgery, the clinician will discuss with the patient the proposed treatment plan and answer any questions the patient may have. During this time, the surgery will be being prepared for the implant procedure. Instruments and equipment will be made readily available but will stay in sterile packaging until an aseptic working environment has been created.
When an implant is being placed surgically, there are normally two implant nurses present, each with different roles. The first nurse – the non-sterile ‘runner’ nurse – helps with preparation of the surgery and gowning of the implant team. The second nurse – the sterile nurse or scrub nurse – assists with the implant procedure. The sterile nurse scrubs up before the procedure and wears sterile gloves and a gown. The non-sterile nurse remains at least 1 ft. away from all sterile areas, which helps to maintain asepsis.
Having two nurses present helps to create an aseptic working environment, alongside the use of:
Sterile drapes;
Sterile gowns and gloves;
Sterile equipment;
Sterile bagged instruments;
Disposable items;
Zoning.
All the above reduce the risk of bacterial contamination, thus increasing the likelihood of implant success.
Surgical procedure
During surgery
Once the patient is prepared for surgery and local anaesthetic has been administered, the sterile nurse has many different roles. The most important of these is supporting, reassuring and monitoring the patient throughout treatment.
It is essential that the patient feels supported and reassured so that they feel comfortable whilst having treatment and are happy to tell the dental team if they need a break or feel any discomfort.
Other essential duties the sterile implant dental nurse undertakes during the surgical placement of a dental implant are:
Ensuring that if an implant stent is being used, the stent has (prior to procedure) been soaked in diluted hydrochloric acid for ten minutes, rinsed, and then placed in chlorhexidine mouthwash ready for placement.
Assisting the clinician during implant placement.
Creating a clear working field – retracting soft tissues.
Anticipating the clinician’s needs and passing the required instruments.
Undertaking aspiration.
Assisting the clinician with suture placement.
Maintaining asepsis.
Ensuring excellent cross-infection control throughout the procedure.
Monitoring irrigation when the clinician is osseous drilling, thus making sure that the bone does not overheat. (An example of this would be correct positioning of the aspiration tube to ensure the bone is irrigated before excess saline is removed.) If the bone is overheated, this could lead to localised bone necrosis resulting in implant failure.
After surgery
On completion of implant placement, it is the implant nurse’s role to make sure the implant packaging is recorded in the patient notes so that the implant serial number is readily available.
Once the patient’s bib, theatre cap and protective goggles have been removed and their face has been cleaned of any debris, post-operative advice is given.
The patient will be asked to take anti-inflammatory medicines, antibiotics and pain relief (if needed) as directed by the clinician. The patient will be given these instructions verbally and in writing.
The nurse’s role is then to give post-operative instructions. These instructions include:
Advising the patient how the procedure went.
Recommending that if the patient has any discomfort, they should take the normal pain relief they would take for a headache. If the patient has been prescribed pain relief, they should take their prescribed medication as required, following the clinician’s and manufacturer’s guidelines.
Advising that if the clinician has prescribed antibiotics, the patient should complete the course.
Informing the patient that they might have some swelling and bruising.
Advising the patient that the use of an ice pack can help with swelling. If the patient does not have ice packs, they can use ice wrapped in a tea towel.
Telling the patient to avoid physical exertion for the next 48 hours.
Asking the patient to avoid alcohol and smoking after implant placement. Whilst the implant site is healing, smoking and alcohol can slow the healing process.
Asking the patient to avoid hot drinks for the next 24 hours and to modify their diet, eating only soft foods for the next couple of days.
Recommending that the next day, the patient should use chlorhexidine mouthwash or warm salty mouthwashes to help the implant site heal.
Telling the patient that if they normally wear a denture, they should wear this as the clinician has advised.
Telling the patient that if the implant site does begin to bleed, they should use a piece of sterile gauze and apply gentle pressure for about twenty minutes – this should make the bleeding stop.
Telling the patient that if they have any worries or concerns, they should not hesitate to contact the practice. The patient should also be given the clinician’s number in case they have any worries or concerns out of practice hours.
Other post-operative advice that should be given relates to the importance of keeping the implant site clean. This oral hygiene advice is reiterated at all appointments. The patient is told the importance of a good oral health regime to keep both natural teeth and the dental implant healthy. It should be explained to the patient that just as natural teeth can get gingivitis and periodontitis, the dental implant can get peri-implant mucositis (inflammation of the gingiva with no bone loss) or peri-implantitis (inflammation of the gingiva with bone loss).
Each patient will be given an individual oral health regime based on their specific needs and influenced by the implant restoration. An example of oral health instruction given to a patient who has had a single implant with implant crown would be:
Brush teeth twice daily for a minimum of two minutes using a small-headed medium tooth brush and a fluoride toothpaste.
Clean teeth interdentally with floss or TePe brushes.
Clean around the dental implant using floss or Super Floss, criss-crossing the floss and moving the floss in a shoe-shine manner.
Clean the gum margins around the implant – use of a single-tufted toothbrush is recommended.
In addition to tooth-brushing, but at a different time to brushing, the use of a mouthwash is also recommended to help keep the implant healthy.
It is important to maintain regular dental check-ups and hygienist visits.
If possible, stop smoking – there are numerous health benefits of stopping smoking, and support can be offered.
If the patient has just had a surgical implant placed, remind them to be careful when cleaning around the implant site and sutures whilst the site is healing.
Although studies have shown that dental implants have a reported success rate of more than 90% over 15 years, there are factors that can affect the dental implant’s integration, leading to integration failure. One of the main causes of this is peri-implantitis – gum inflammation around the dental implant and bone loss. Peri-implantitis is caused by poor oral hygiene and the accumulation of plaque around the dental implant. At all stages of the dental implant procedure, from planning to the implant review, it is the implant nurse’s role to discuss with the patient the importance of good oral hygiene. From spending time with patients and providing oral hygiene instruction, we can discuss and demonstrate new skills so that the patient can maintain a healthy mouth, improving the dental implant’s chances of success.
Smoking can also reduce the likelihood that an implant will be successful. Smoking affects the local blood supply, so it can affect the healing process and lead to implant failure. As an implant nurse and an oral health educator, part of my role is providing smoking cessation advice. As a dental professional, educating patients on the effects of smoking on the oral tissues and the benefits of giving up smoking not only improve the chances of successful implant placement but can improve the patient’s general health.
As previously discussed, the patient will attend many appointments during the planning and placement of a dental implant. At each stage, the implant dental nurse will play an important role in ensuring the treatment is successful.
From working as an implant dental nurse, I know what a vital part of the implant team I am. I provide excellent cross-infection control, which is essential for implant integration, and assist with implant placement. I also give important patient advice, guidance and instruction, and act as a chaperone whilst supporting both the clinician and the patient. The role is challenging in many ways but extremely rewarding – especially when you get to see the finished results and the difference that dental implants make to people’s lives.
NEBDN National Certificate in Dental Nursing, NEBDN Dental Sedation Nursing, NEBDN Oral Health Education , NEBDN Dental Radiography, Kings Certificate in Implant Nursing, Level 5 Diploma in Leadership and Management, Level 3 Award in Education and Training.


 As from the 1st of August 2018, an enhanced continuing professional development (CPD) scheme will start for dental care professionals (DCPs).